

Windows 11pro virtual machine offers flexibility, convenience, and the ability to explore and test the latest version of windows without making permanent changes to your primary operating system or hardware, with a windows 11pro virtual machine you can create a customized environment to meet your desire or needs.
The steps below will guide you to create your windows 11pro virtual machine:
firstly it's important for you to have an Azure account with a subscription, click this link azure.microsoft.com to create a free Microsoft azure account and sing in:
CREATING YOUR VIRTUAL MACHINE
i. After creating and sing in to your azure account, type virtual machine on the search bar on your azure account
ii. From the search result, select "Virtual Machine" from the list of resources displayed
iii. Click on the "Create" button
iv. Select the virtual machine highlighted.

v. You will be directed to the "Basics" page.
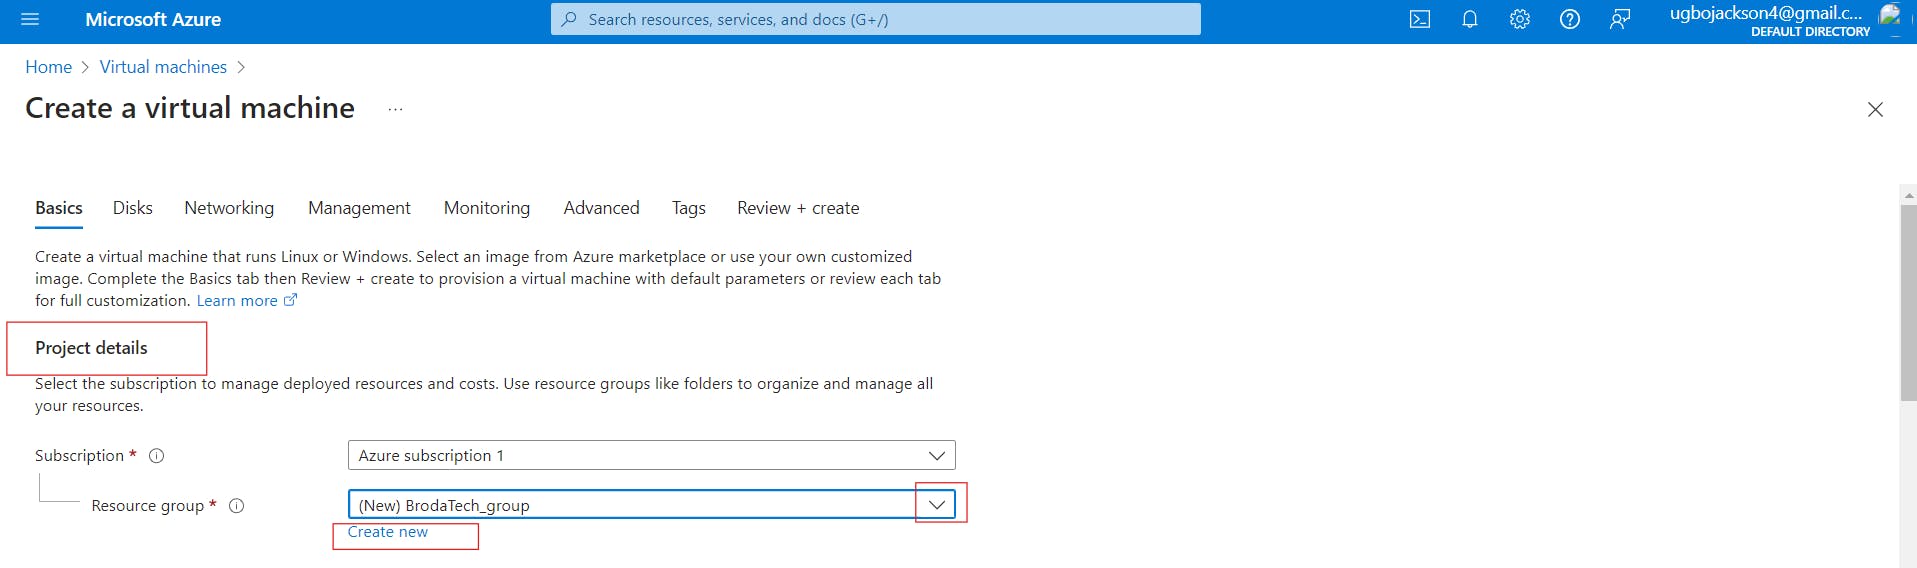
Project Details
In the project details category, we have the subscription and resource group;
a) Subscription
An Azure subscription in simple terms means a membership or access pass to use Microsoft Azure. It's similar to subscribing to a service or signing up for a subscription plan. With an Azure subscription, individuals or organizations can use and benefit from the various services and resources provided by Azure at a cost depending on your type of subscription. However, it also offers free and trial options, giving you a chance to explore and experiment with Azure before committing to a paid subscription.
b) Resource Group
A resource group in Azure is like a container or folder that helps you organize and manage the different resources such as virtual machines and databases that are use in the Azure cloud.
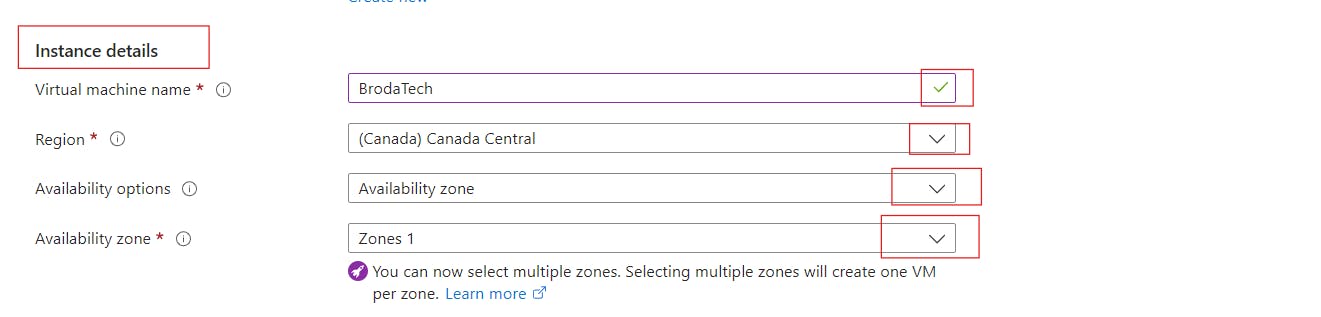
Instance Details
a) Give your virtual machine a name
b) In the region section, select the location you want your virtual machine to be.
A region refers to a specific geographical location or area were data centers infrastructure and services are hosted. Each region operates independently and is designed to be self-sustain, with its own set of resources and infrastructure.
c) Next, click on the drop-down to select your availability option and availability Zone.
In Azure, a region can consist of three availability zones, known as Zone 1, Zone 2 and Zone 3. Each zone has one or more data centers that are kilometers apart from each other.
These data centers are equipped with independent power, networking, and cooling infrastructure to minimize the impact of failures and disruptions. What physically Links these data centers together is Fibre Optic Cable. Fiber optic technology allows high-speed data transmission over long distances while maintaining low latency and high bandwidth capabilities.
d) Select your security type from the drop-down

e) In the image section, select Window 11 pro from the drop-down
An image is an operating system. It's like a blueprint for creating virtual machines or computer systems. It has all the instructions and settings needed to set up a computer with a specific operating system and software.

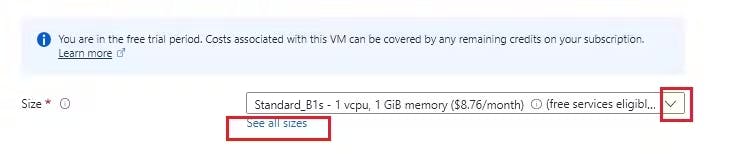
f) Select the size of your virtual machine from the drop-down or click on "See all sizes". Leave the other information in default state.
Administrator Account
a) Give your account a username and password. Also, confirm the password to ensure it aligns.

Inbound Port Rules
On the inbound port rules section, select "Allow selected ports" and then select RDP (3389). This port will give you remote access to your physical work desktop computers.

Click on "Next: Disks>" to direct you to the Disk page
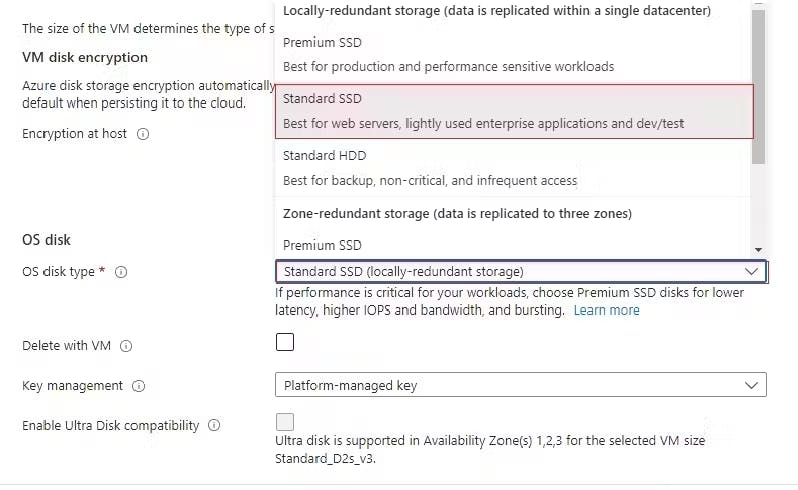
Disk
a) On the Disk page click on the OS disk type dropdown and select Standard SSD or any disk type of your choice as shown below. Leave the other columns as default.
b) Leave the networking, management, monitoring and advanced pages as default. then move to the next page "Tag page".
Tag
a) Give your tag a name
Tags is used to label and organize resources in cloud computing environments. The purpose of tags is to provide metadata or additional information that helps in managing, organizing, and tracking resources within a cloud infrastructure.

b) Next, click on Review+create
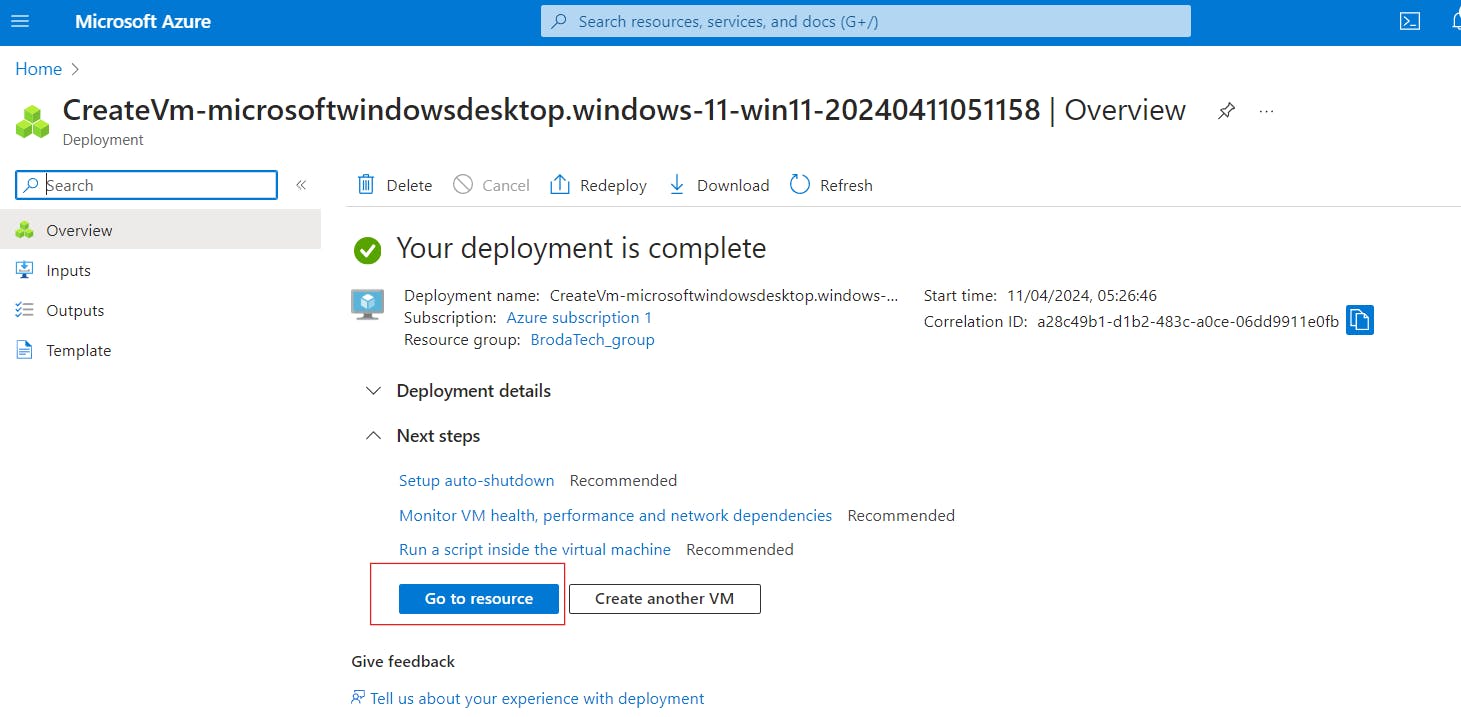
c) Review the summary of your virtual machine configuration and click on the "Create" button to begin the deployment process.

d) Once the deployment is complete, click on "Go to resource".
Connect to Your Windows Virtual Machine.
Create a remote desktop connection to the virtual machine. These directions tell you how to connect to your Windows 11 operating system.
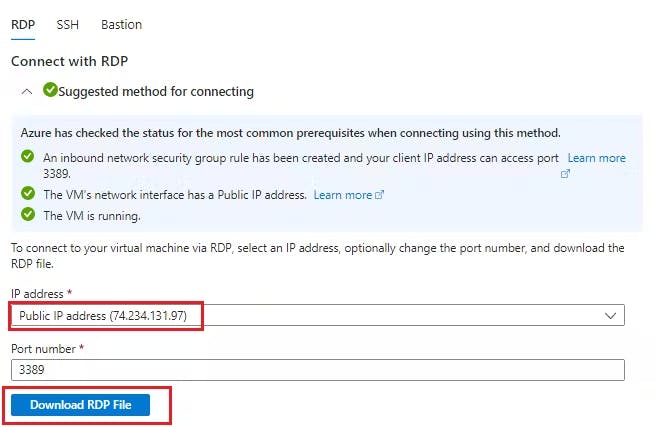
a) On the overview page of your virtual machine click "Connect".

b) Connect with RDP, leave the default settings and click the download RDP file to your file
c) Open the downloaded RDP file and click "connect"
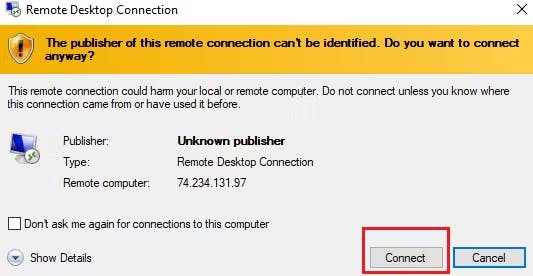
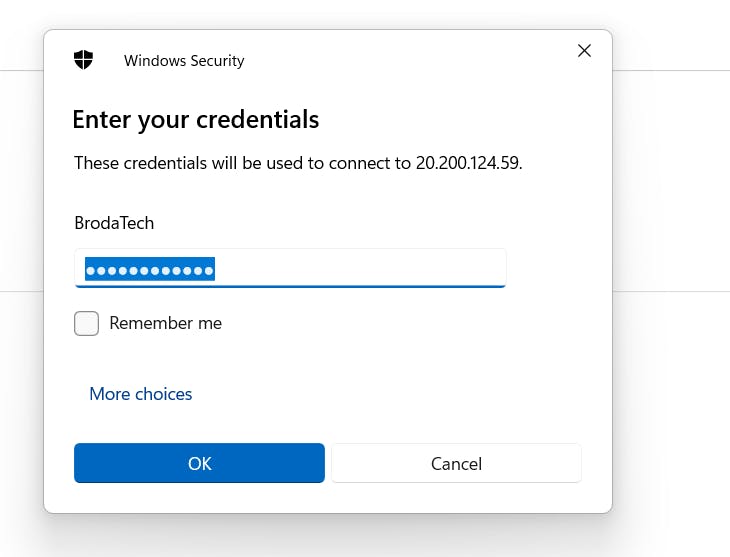
d) Input your username and password
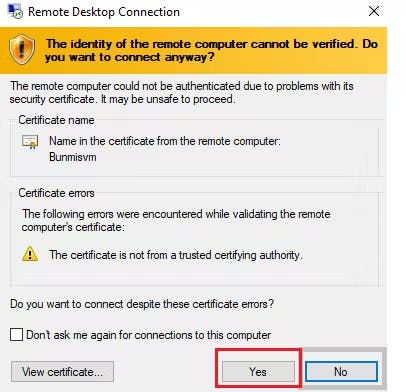
e) Click yes to the prompt
Welcome!! You are connected to your Windows 11 Pro.

How To Disassociate IP Address
Situations may arise where you need to save cost running your virtual machine.One way to optimise cost is to disassociate your IP address from your virtual machine.
a) Click on your IP address

b) Click on the Overview.
c) On the overview page, click on dissociate at the top-right of the page.

d) It will ask you to confirm dissociation, click "Yes'. Once you click yes, your IP address will be dissociated from your Virtual Machine.
I hope this step-by-step tutorial helped you create your Windows 11pro virtual machine. Thank you....