


Creating and connecting to a Linux VM on azure portal can be tricky nevertheless, it is an easy process and it's just a little different from windows VM. In this post we will be learning how to create a Linux VM. You should already have an azure account and subscription. The subscription can either be your regular paid subscription, free credits for new users or student’s account. the steps below will assist you to create your Linux VM.
SIGN IN TO AZURE PORTAL
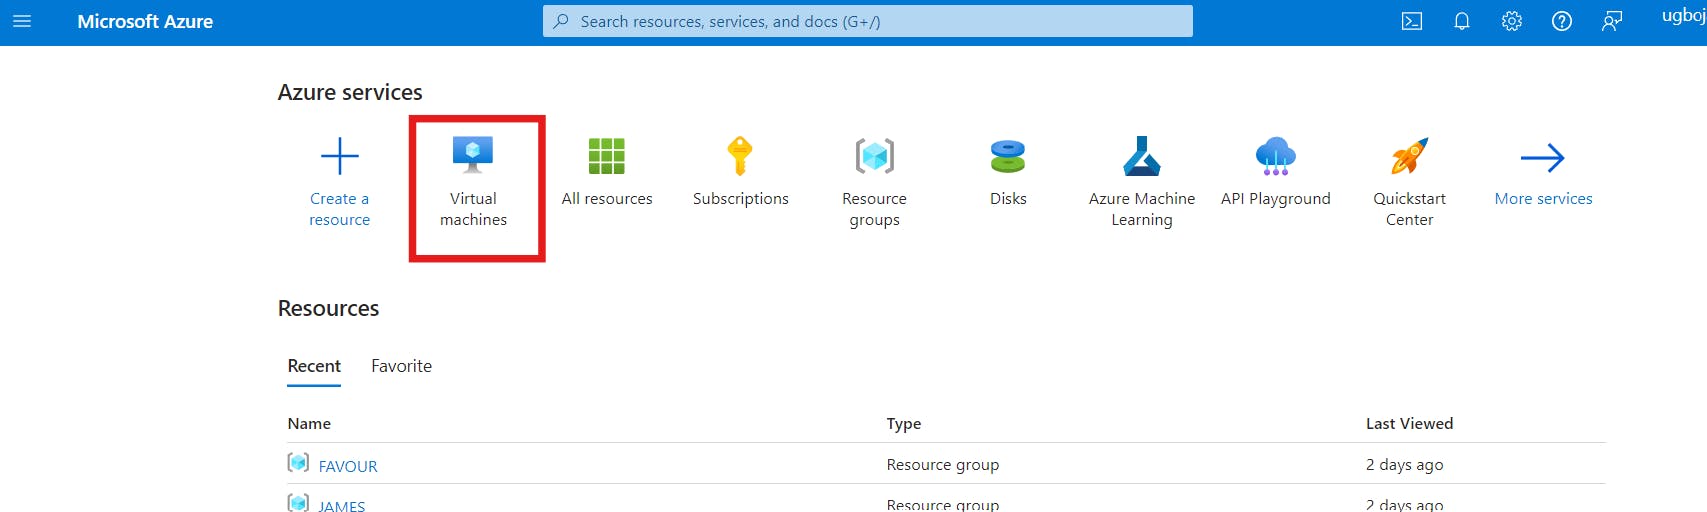
First Step is to login to your Azure account and click on the Virtual Machine tab, or use the search bar to locate the Virtual Machine.
Select the Virtual Machine
and Click on the "Create" button; choose Azure Virtual Machine
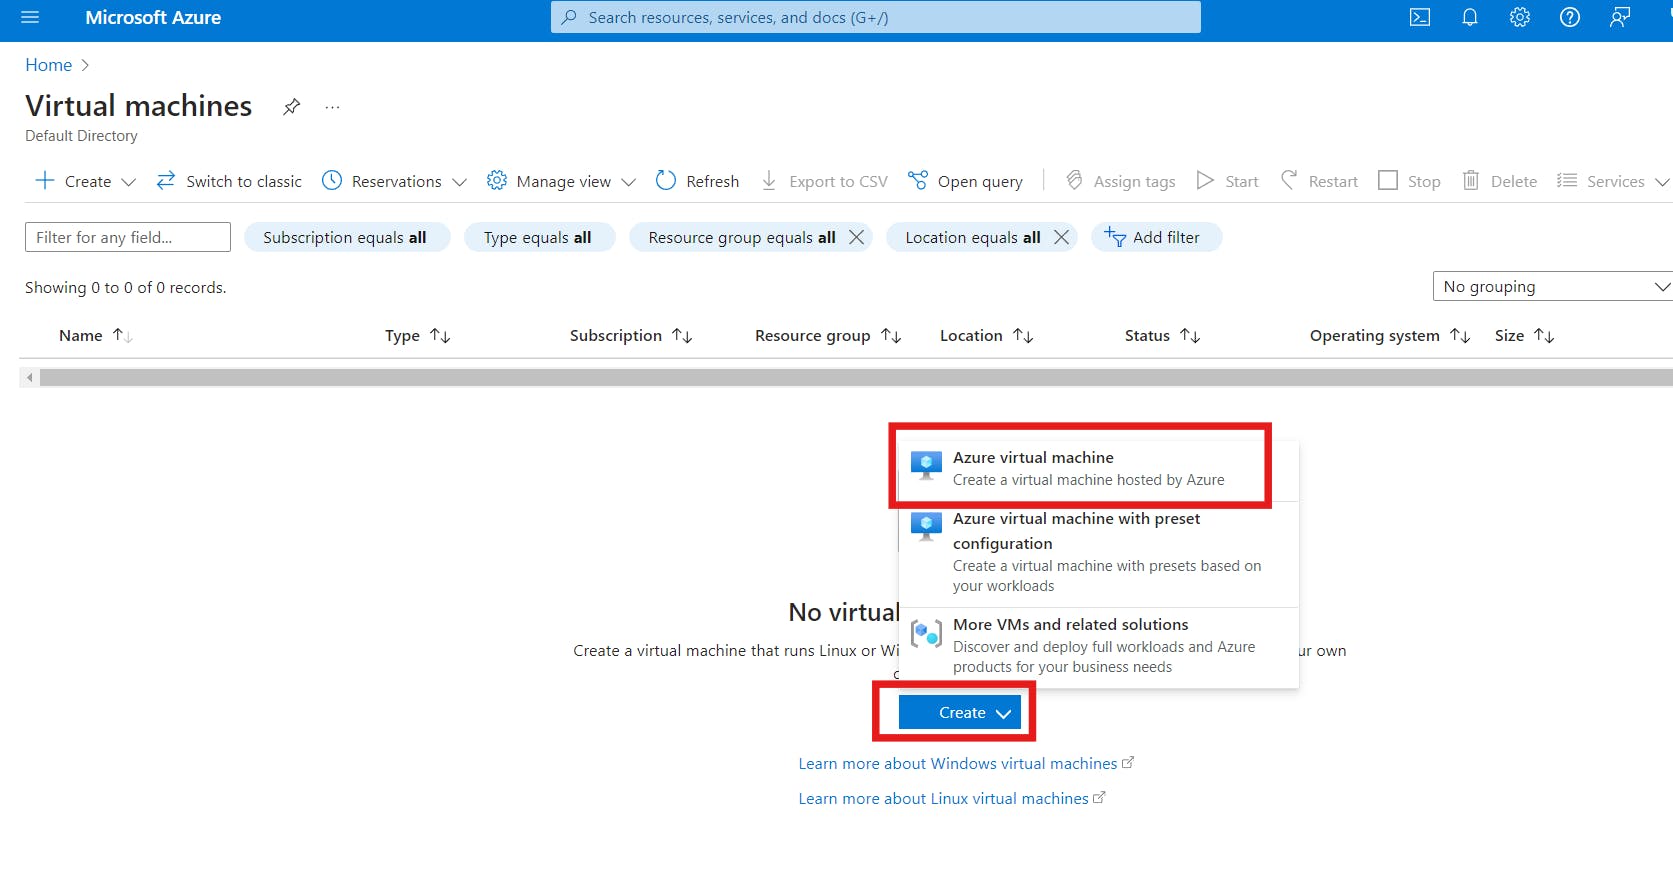
You will be directed to the "Basics" page.
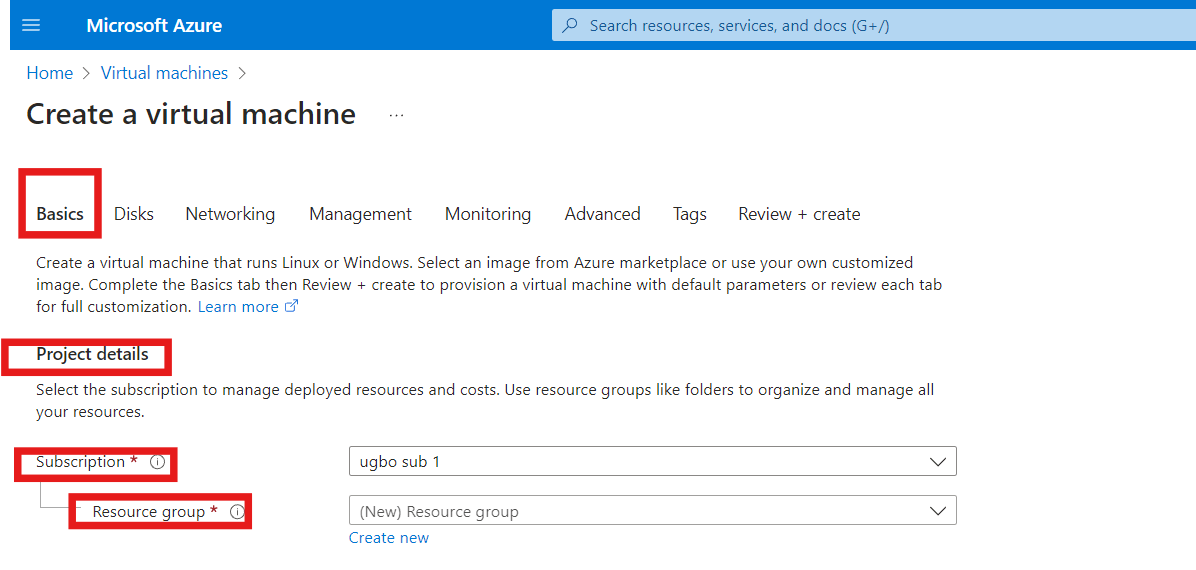
- Project Details
In the project details category, we have the subscription and resource group
a) Subscription
Azure Subscriptions are a logical unit of Azure services that are linked to an Azure account. In order to take advantage of Azure's cloud-based services, you must have a subscription as it serves as a single billing unit for Azure resources used in that account.
b) Resource Group
A resource group is a container that holds related resources for an Azure solution or services. The resource group can include all the resources for the solution, or only those resources that you want to manage as a group. You decide how you want to allocate resources to resource groups based on what makes the most sense for your personal needs or organization. it's preferable to add resources that share the same lifecycle to the same resource group so you can easily deploy, update, and delete them as a group.
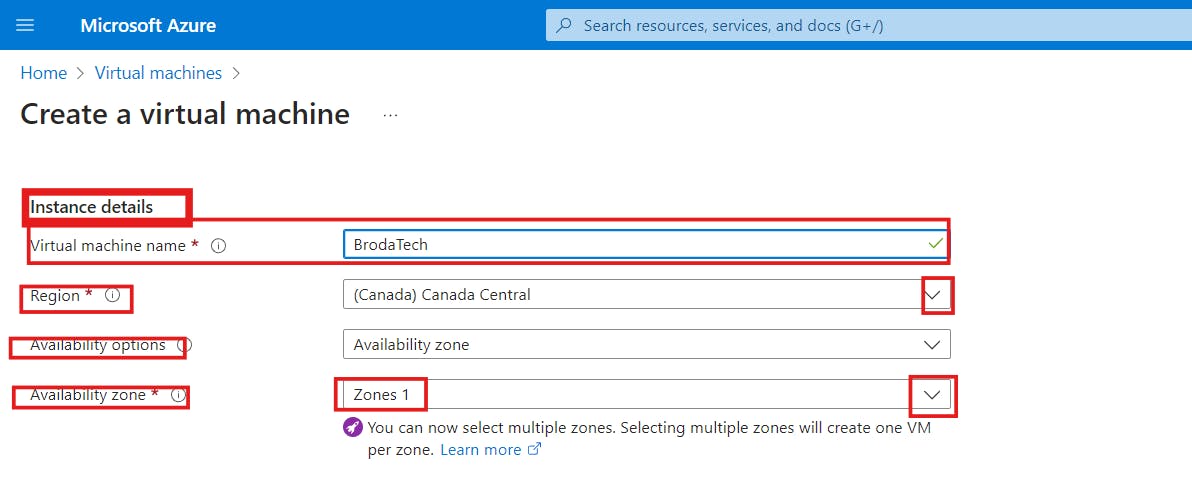
- Instance Details
a) Give your virtual machine a name
b) In the region section, select the location you want your virtual machine to be.
A region refers to a specific geographical location with data centers that host infrastructure and services. Each region operates independently and is designed to be self-sustained, with its own set of resources and infrastructure.
c) Next, click on the drop-down to select your availability option and availability Zone.
In Azure, a region can consist of three availability zones, known as Zone 1, Zone 2 and Zone 3. Each zone has one or more data centers that are kilometers apart from each other.
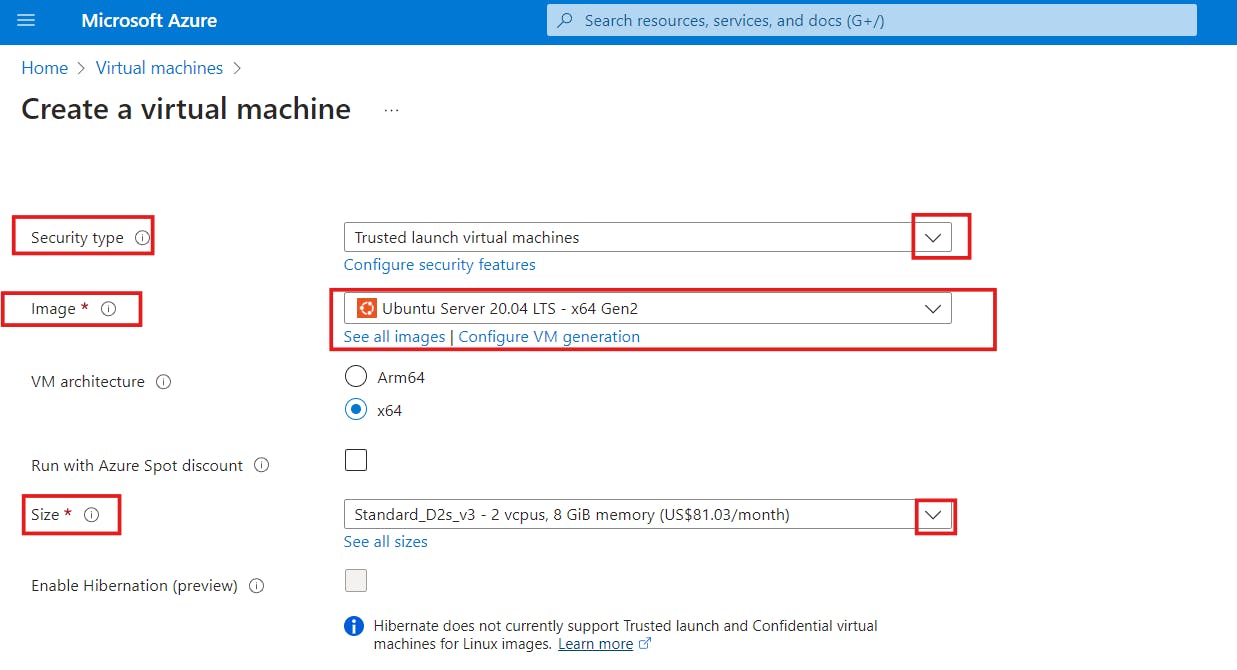
d) Select your security type from the drop-down
e) In the image section, select any Ubuntu Server.
Ubuntu is a Linux Operating System. An image is an operating system. It's like a blueprint for creating virtual machines or computer systems. It has all the instructions and settings needed to set up a computer with a specific operating system and software.
f) Select the size of your virtual machine from the drop-down or click on "See all sizes". Leave the other information in its default state.
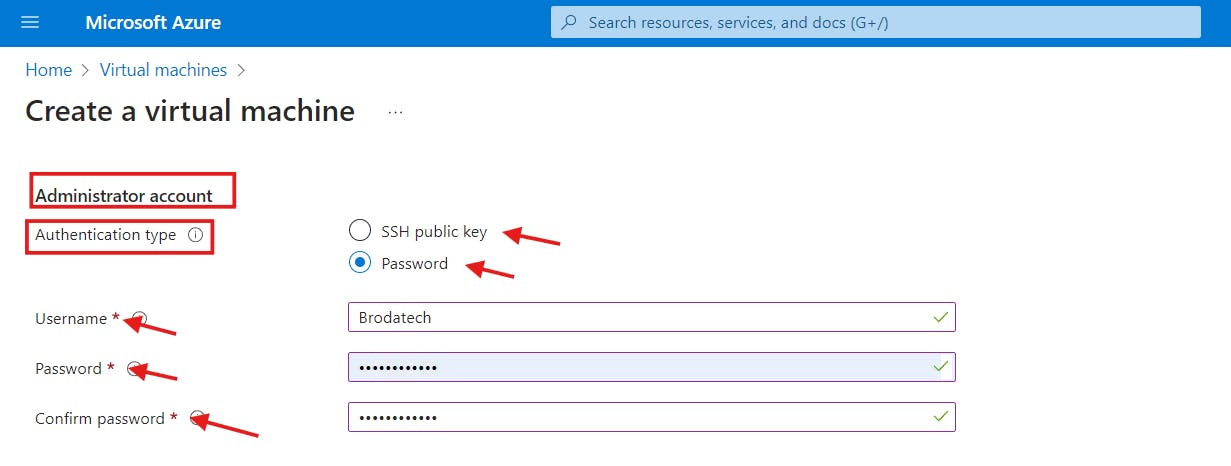
- Administrator Account
a) Select the password authentication type; Choose your preferred mode of authentication. when choosing password it is very important to remember your username and password. your password must contain uppercase letters, lowercase letters, numbers and must be 12 characters long. Password-based authentication involves using a username and secret password to access the operating system.
While SSH public key authentication relies on key pairs and cryptographic algorithms for secure remote access. Public key authentication offers stronger security and protection against various attacks, making it a preferred choice for secure remote connections. However we will be using a chosen Password for this article.
b) Type your username and your password.
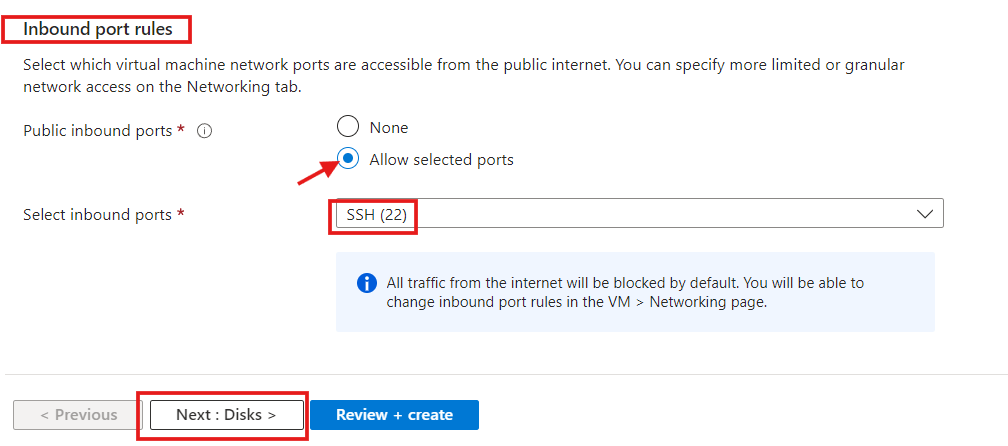
- Inbound Port Rules
a) In this category, select SSH (22) as your inbound port to connect to the Linux server.
b) Click "Next: Disk>" to direct you to the disk page
- Disk
a) On the Disk page click on the OS disk type dropdown and select Premium SSD or any disk type of your choice as shown below. Leave the other columns as default.
b) Leave the networking, management, monitoring, advanced pages and tag at their default settings . skip to the Review+create.
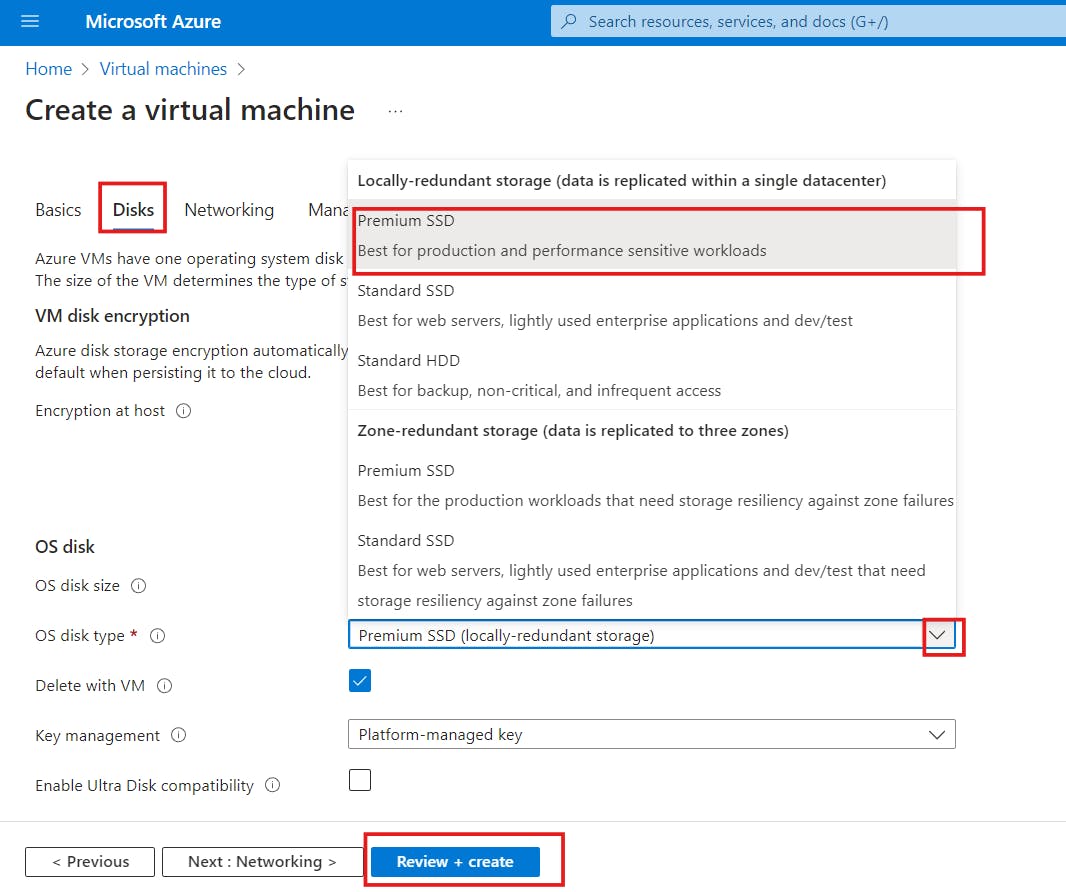
c) Review the summary of your virtual machine configuration and click on the "Create" button to begin the deployment process
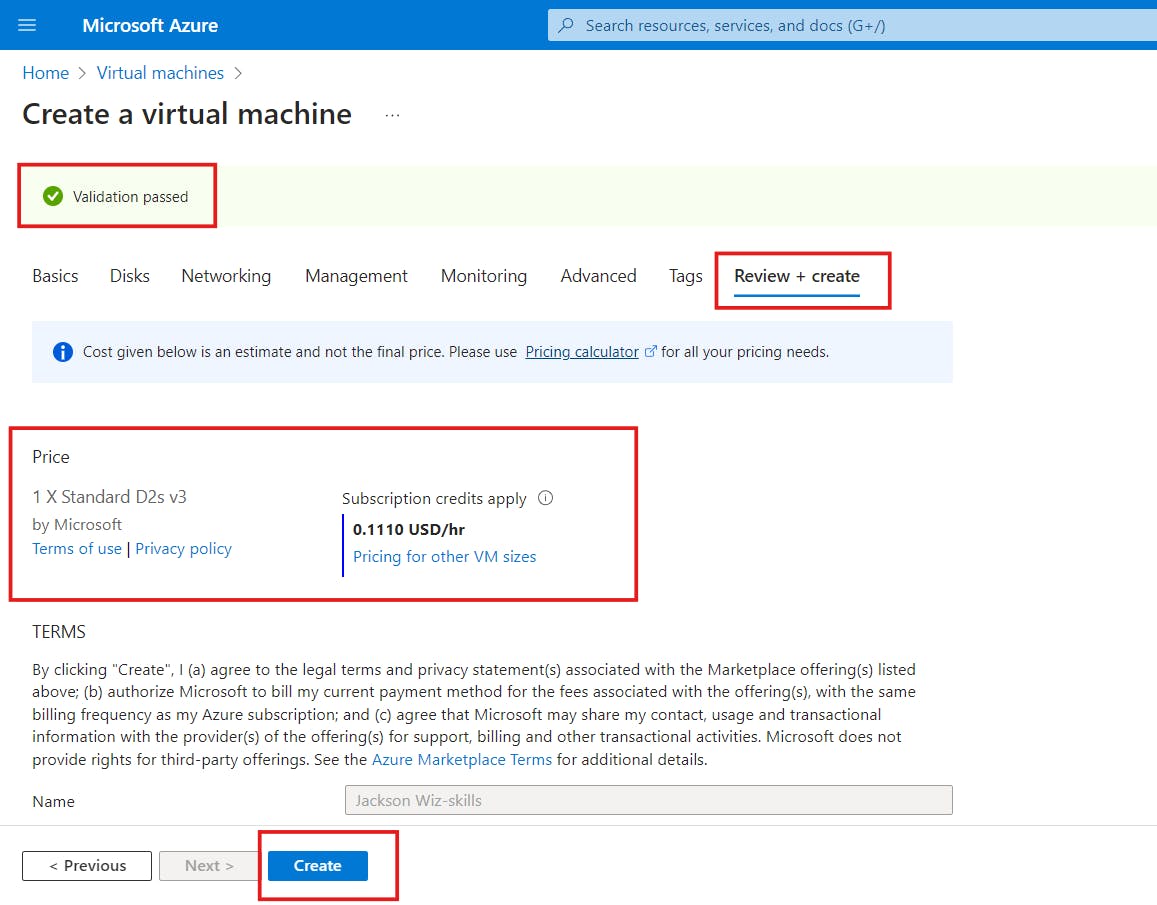
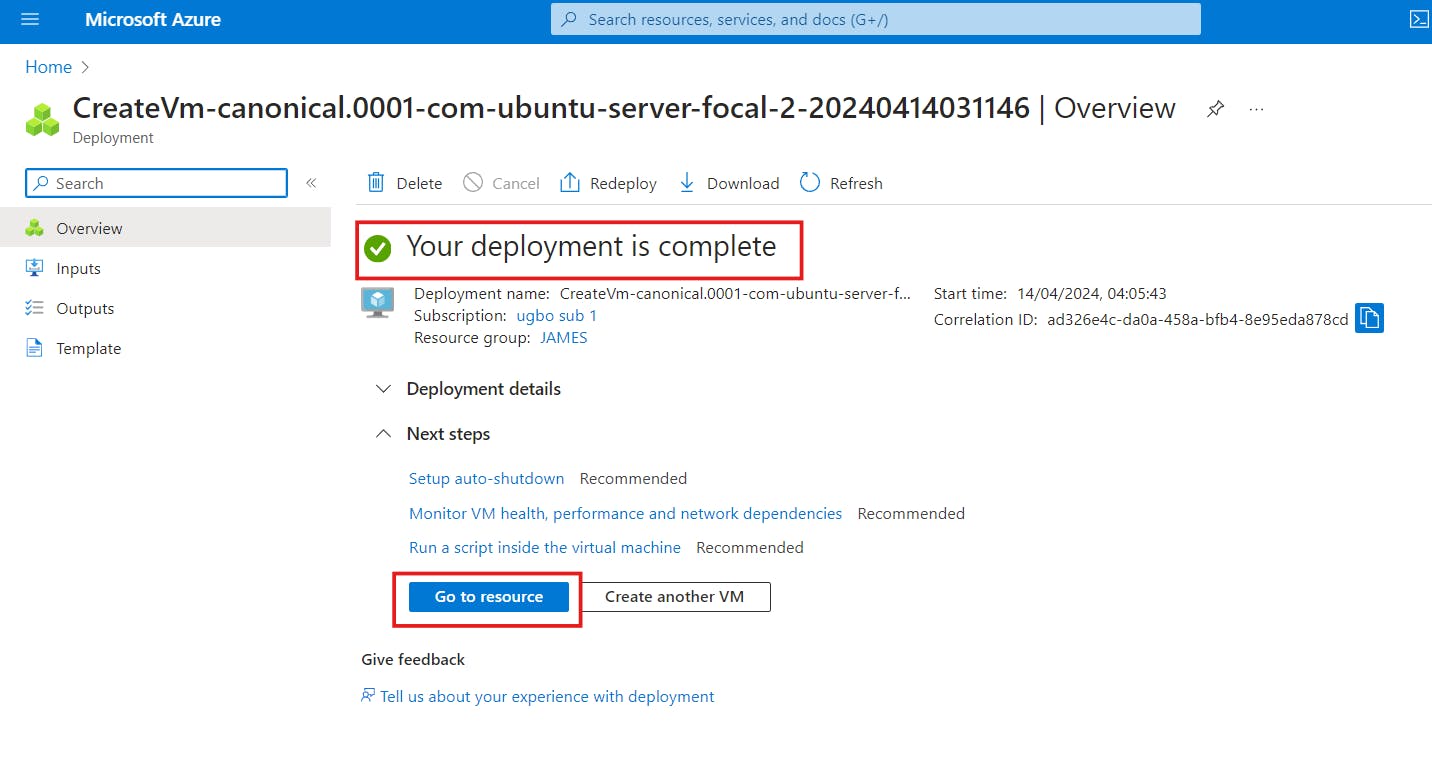
d)Once the deployment is complete, click on "Go to resource".
CONNECTING TO THE LINUX VIRTUAL MACHINE
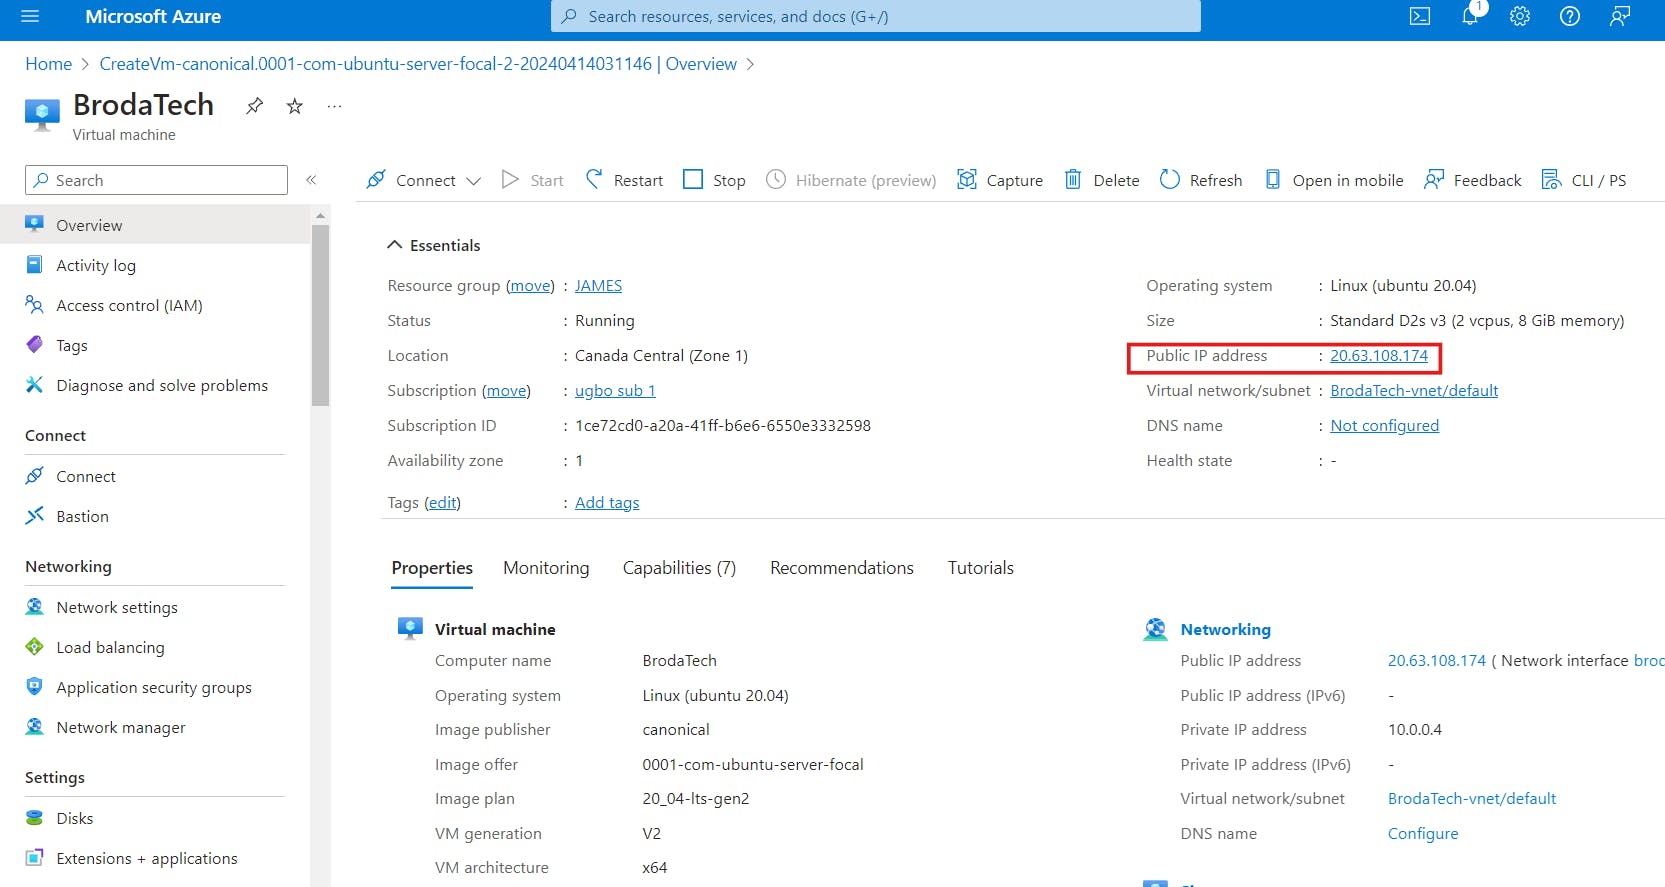
At this point the Linux virtual machine has been created and ready for use, in order to connect to the Linux virtual machine we will be using the SSH command key;
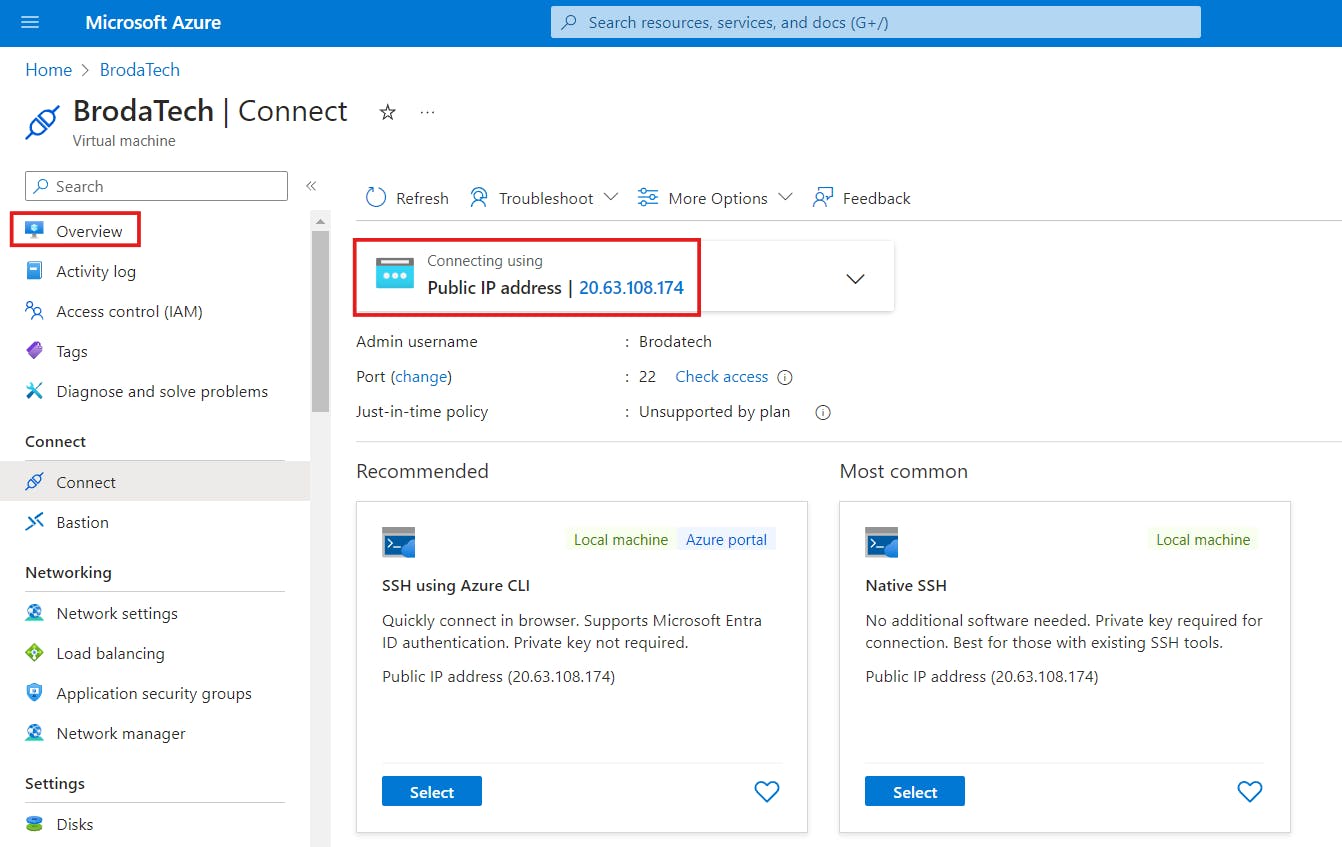
a] copy the Linux virtual machine IP address
b] Open PowerShell on your Laptop and input the following command " ssh '', give space and input your username you chose while creating the Linux VM, with an @ key input your IP address and Press enter. example ( ssh Brodatech@20.63.108.174) as showed below;
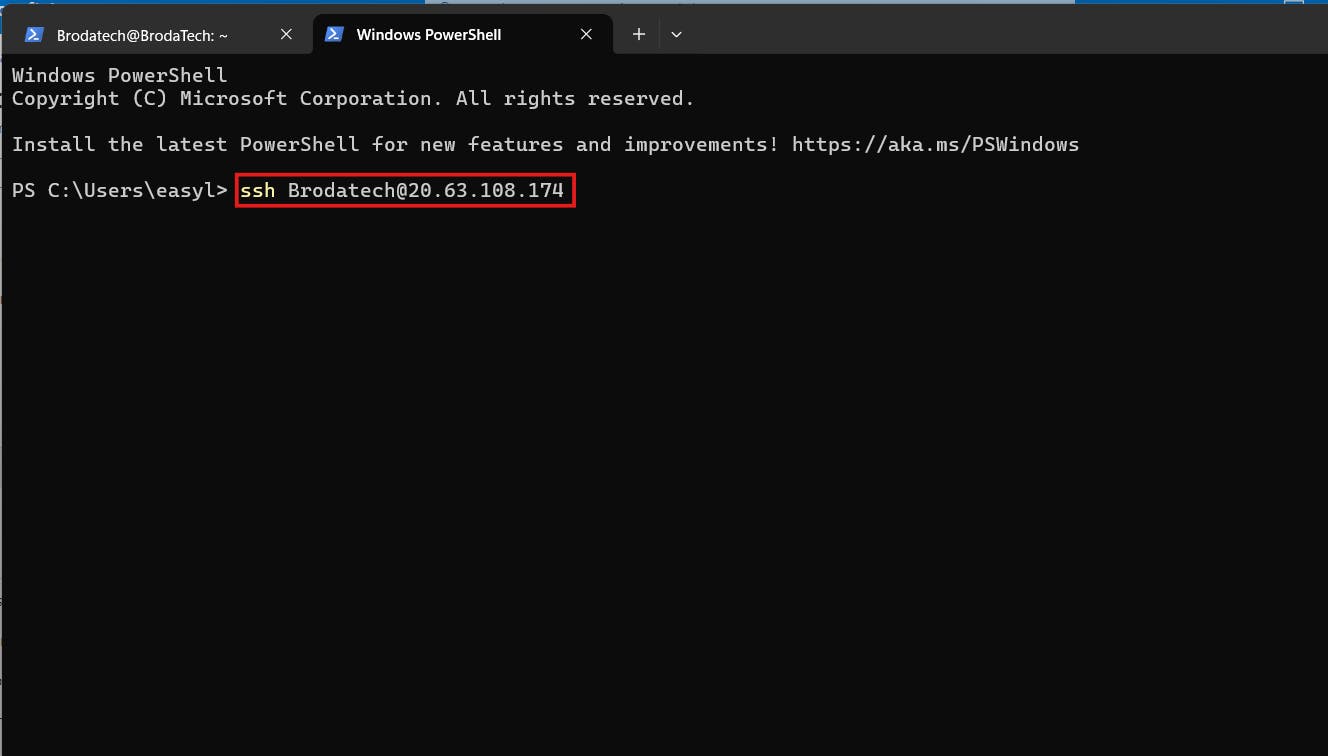
c] and press "enter" , it will request for password input the password you used when creating the Linux VM.
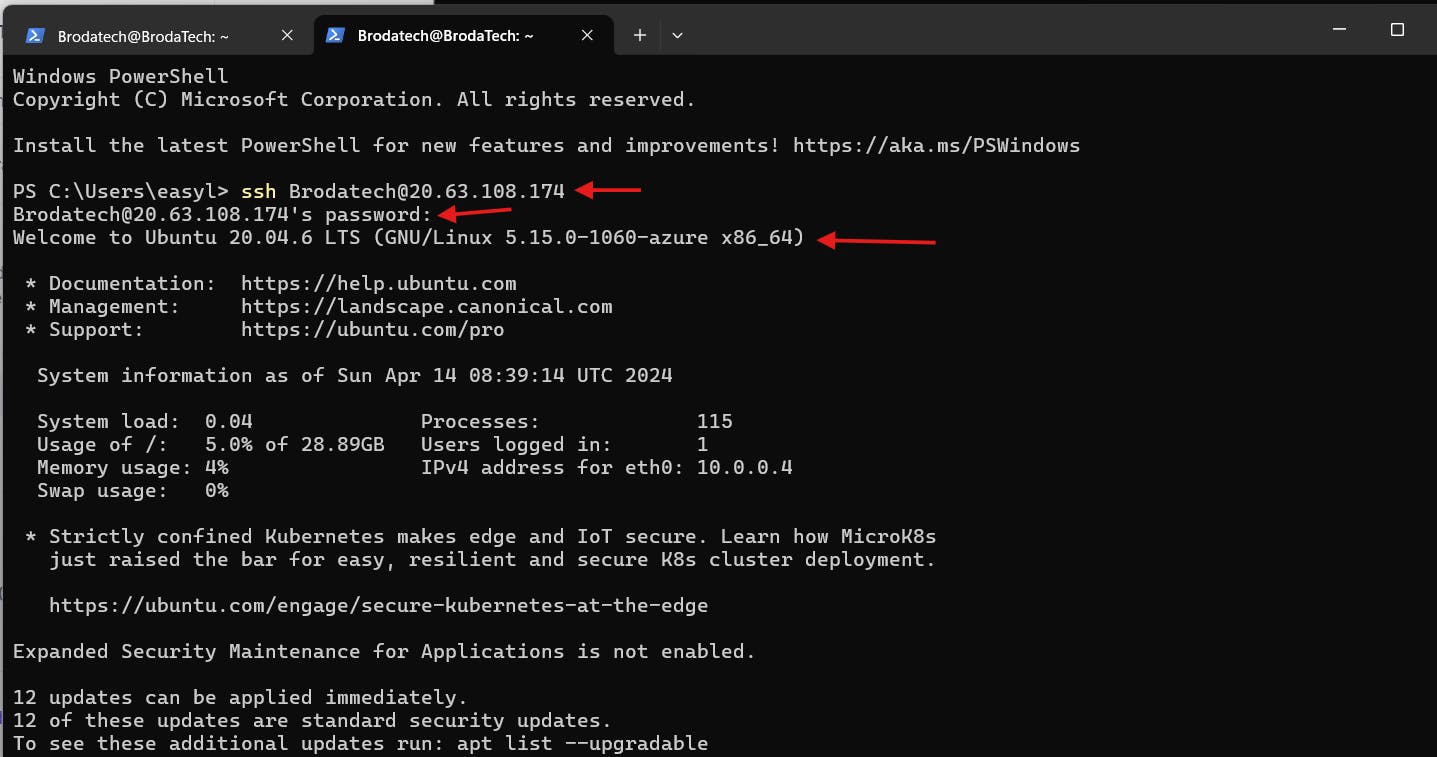
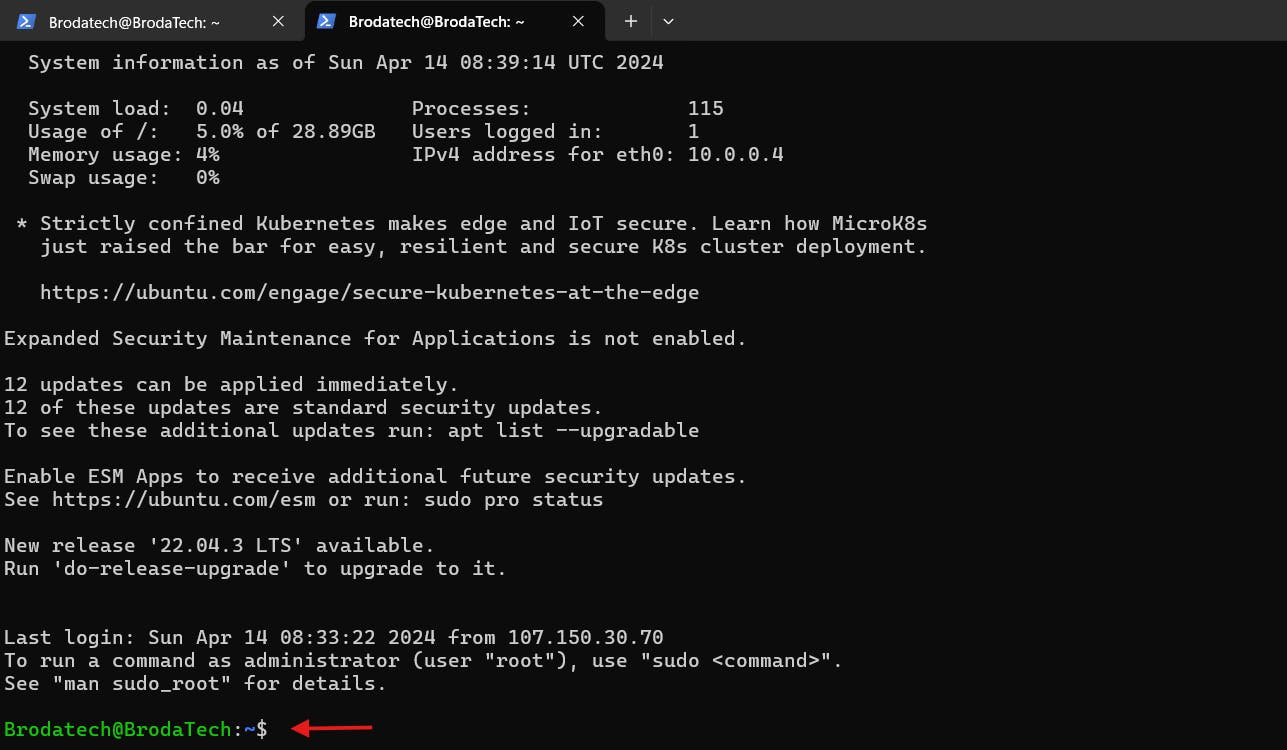
as seen above after inputting the right password i used when creating the Linux VM have been able to gain access to my Linux VM (virtual machine).
How To Disassociate IP Address
in order optimize or save cost, you can disassociate your IP address from your virtual machine, the steps below will guide you:
a) Click on your IP address
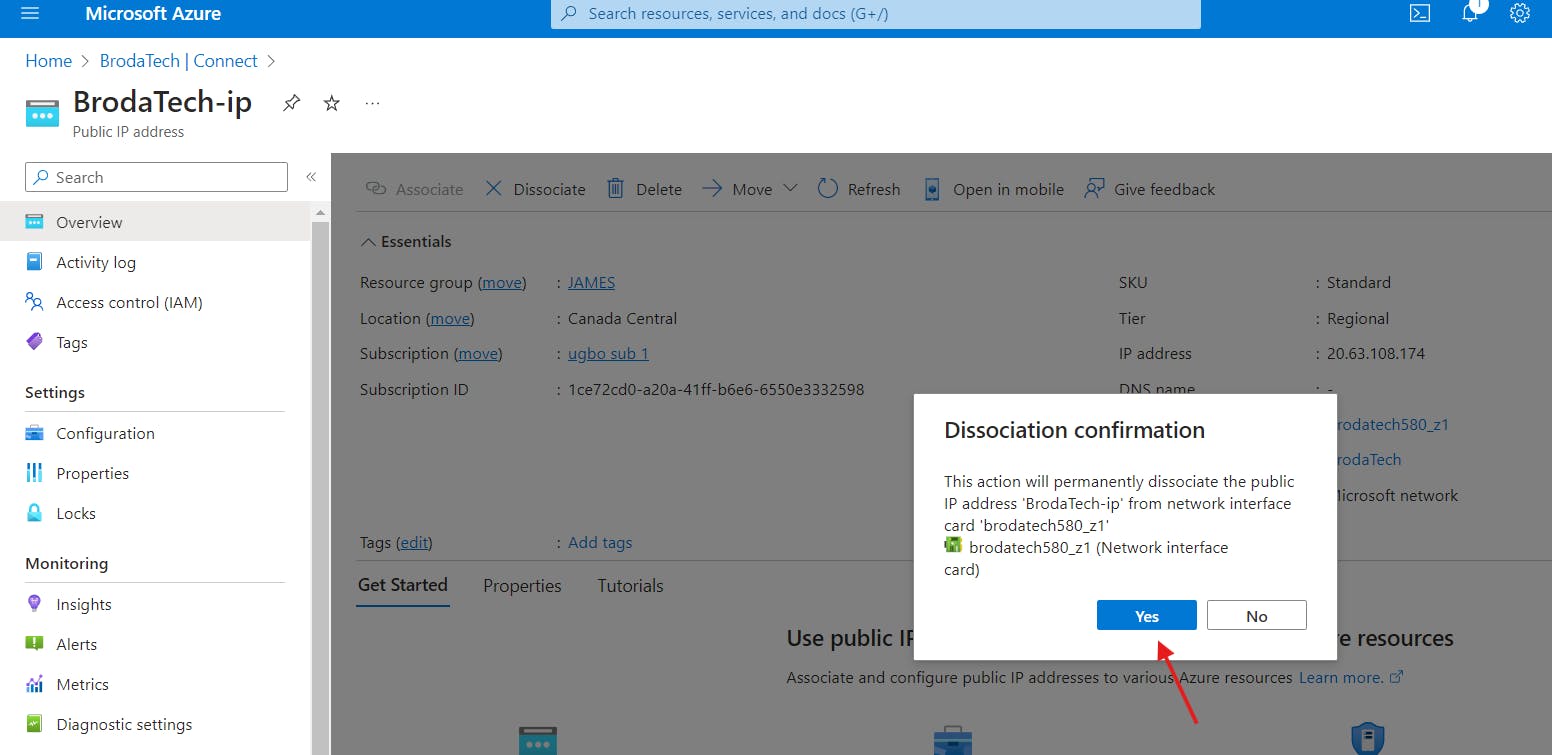
b) On the overview page, click on dissociate at the top as show below;

c) It will ask you to confirm dissociation, click "Yes'. Once you click yes, your IP address will be dissociated from your Virtual Machine.
How To Associate IP Address
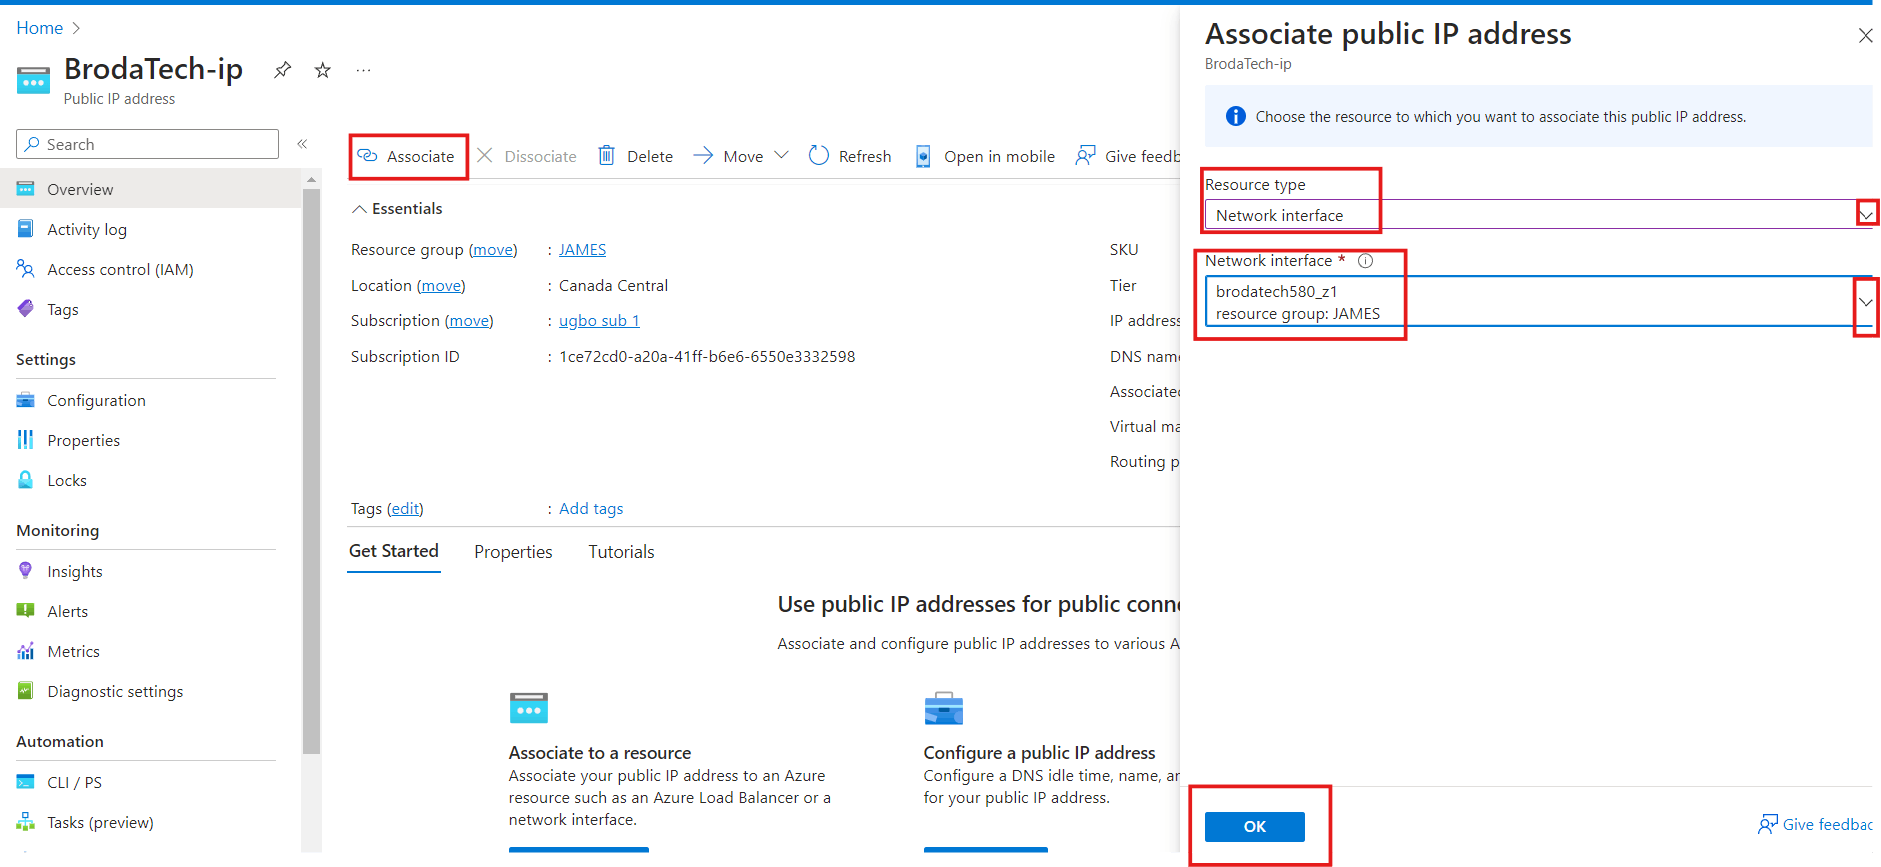
a)To associate your IP, simply click on the Associate button.
b) A page will open up, choose the Resource type as Network interface, and select your resource group under the network interface and click on OK.
c) Your IP will be associated back to your virtual machine
Thank you for reading and I hope this article was helpful.......